Creating a GitHub App
As discussed in previous sections, Cocov leverages a single GitHub App to authenticate users, and act as itself on the GitHub Organization it is being installed on. This section contains instructions on how to create and correctly configure a GitHub App to be used by the platform.
Where to Create a New App #
In order to create a new GitHub App, first access your organization’s settings page. This can be done by accessing a list of your own Organizations, and then clicking on the Settings button of the organization you plan on installing Cocov:

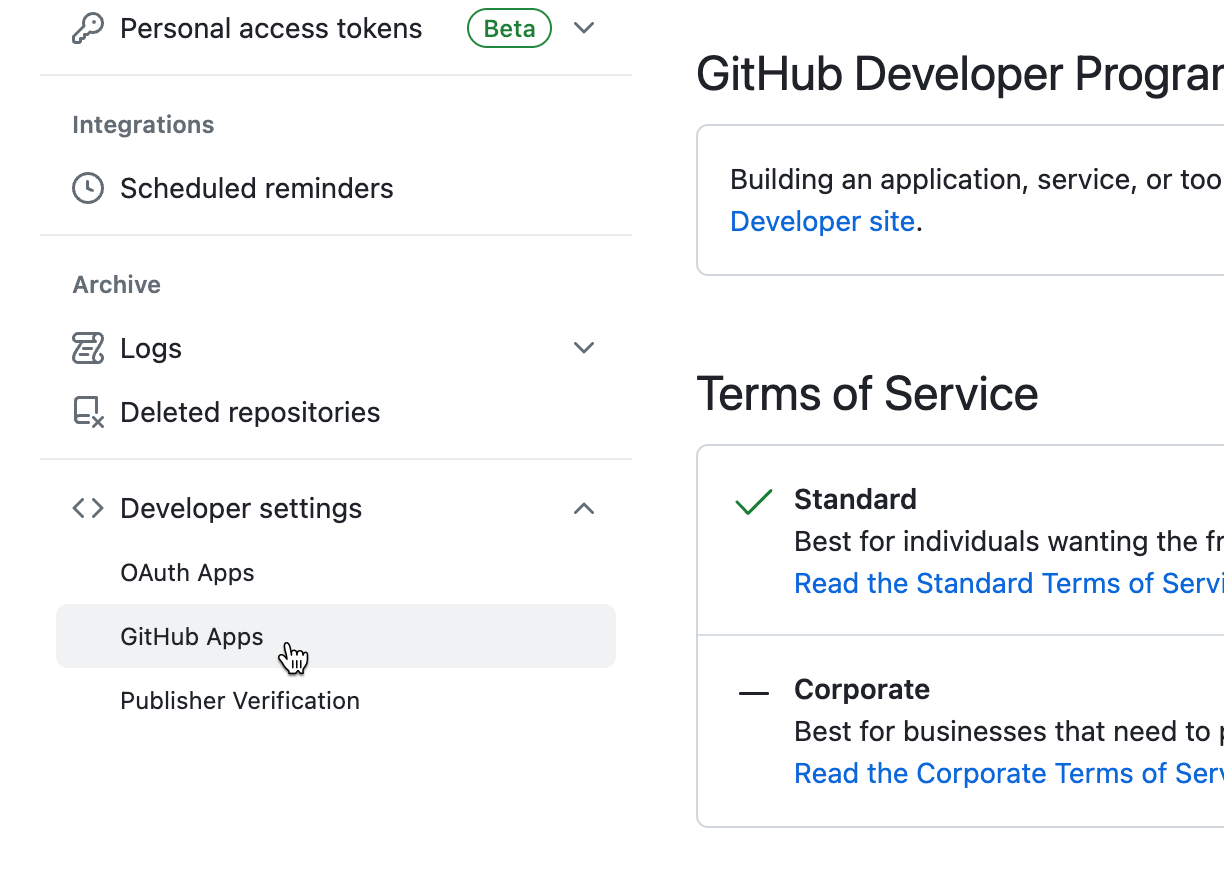
In the leftmost menu, scroll to its last options, and expand Developer Settings to reveal the GitHub Apps option. Then, select it.
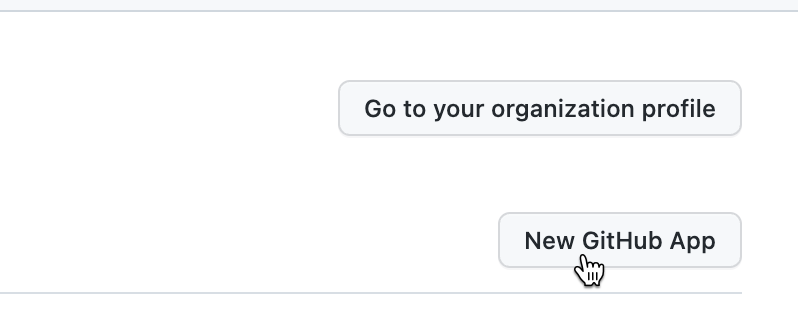
In the next page, GitHub lists all GitHub Apps created by your organization, if any. Select the New GitHub App as shown in the picture below:
Registering a New GitHub App #
Registering the new app comprises naming, defining its callback and webhook URLs, permissions, and where the app will be installed.
This section will describe what should be provided on each of the fields GitHub presents when creating a new app:
Identification Fields #
- GitHub App Name: The name of your app. Cocov, Cocov-CI and alternations are not good choices. Instead, try using Cocov - YourOrganizationName or something that clearly binds to your organization.
- The description field is optional.
-
Homepage URL: It is recommended to use Cocov’s homepage on this field:
https://cocov.dev. You may also want to use an URL to your intranet or internal documentation explaining what Cocov is. This field is required.
Under Identifying and authorizing users #
-
Callback URL: In this field, provide the full URL to your Web UI instance. For instance, if your instance is accessible by your users under
cocov.example.org, this field must have the valuehttps://cocov.example.org. - Expire user authorization tokens: Ensure this checkbox is unchecked
- Request user authorization (OAuth) during installation: Ensure this checkbox is unchecked
- Enable Device Flow: Ensure this checkbox is unchecked
Under Post installation #
All fields under this section may be left with their default values or empty.
Under Webhook #
- Active: Ensure this checkbox is checked
-
Webhook URL: This field must have the full URL to your API webhook endpoint.
- When using Cocov’s Helm Chart and ingresses it provides, the value is the ingress host followed by
/v1/github/events. For instance, if your external ingress host isext-api.cocov.example.org, the value on this field should behttps://ext-api.cocov.example.org/v1/github/events - Otherwise, the value is the full address to your API instance that’s exposed to the internet, followed by
/v1/github/events.
- When using Cocov’s Helm Chart and ingresses it provides, the value is the ingress host followed by
- Webhook Secret: Provide a randomly-generated value to be used as a salt for validating GitHub requests. This same value must be provided to the API. See API’s Configuration Options for more details. GitHub’s documentation also has a section regarding Webhook Secrets
- SSL verification: If your webhook URL uses HTTPS (and it should), GitHub will check for your certificate validity before delivering events. Keep it enabled.
Under Permissions #
This is one of the most critical parts of the configuration, as misconfiguration will cause the platform to behave incorrectly. Please make sure to enable options listed here.
Repository Permissions #
Repository Permissions controls to which resources Cocov has access. The platforms requires access to Checks, and Commit Statuses to report statuses, Contents to be able to clone commits to be provided to checks, and Pull Requests to be able to update Pull Requests with statuses.
- Checks: Read and write
- Commit statuses: Read and write
- Contents: Read and write
- Metadata: Read-only
- Pull Requests: Read and write
Organization Permissions #
Cocov requires a single organization permission to be able to identify if a given user is part of your organization. This is vital to allow users to login into the platform.
- Members: Read-only
Account Permissions #
As users will use this same app to login into the platform, Cocov needs to check the user’s emails in order to be able to associate commits with Users (through their email addresses)
- Email addresses: Read-only
Under Subscribe to Events #
Here, events that should be relayed to Cocov through the Webhook must be checked. Check those boxes for the following events be relayed to your instance:
- Delete: Branch or tag deleted.
- Member: Collaborator added to, removed from, or has changed permissions for a repository.
- Membership: Team membership added or removed.
- Organization: Organization deleted, renamed, member invited, member added, or member removed.
- Push: Git push to a repository.
- Repository: Repository created, deleted, archived, unarchived, publicized, privatized, edited, renamed, or transferred.
Where to Install #
Finally, GitHub will ask where the new app may be installed. Select Only on this account, and finally click the Create GitHub App button.
Configuring your new App #
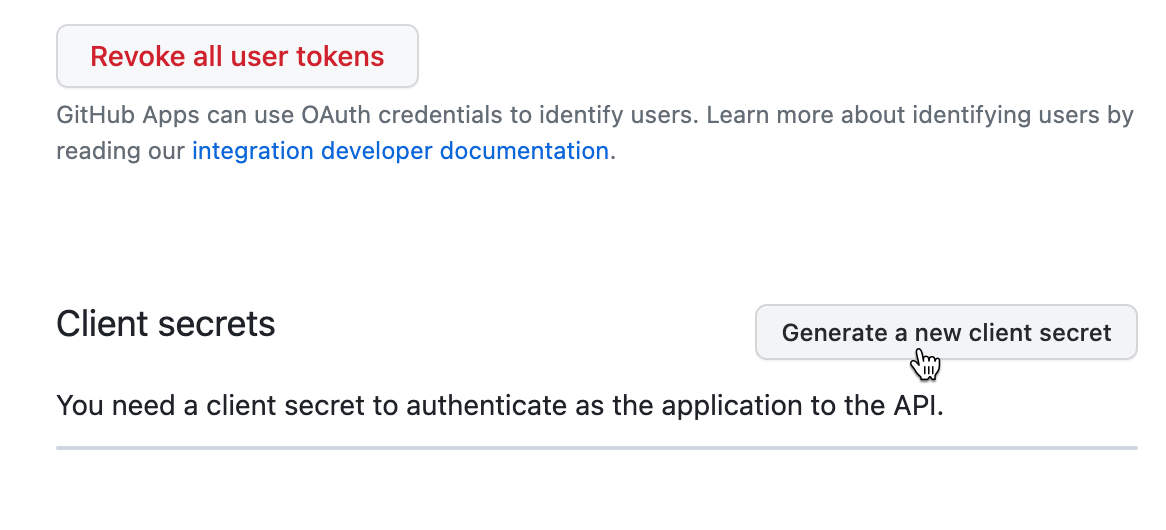
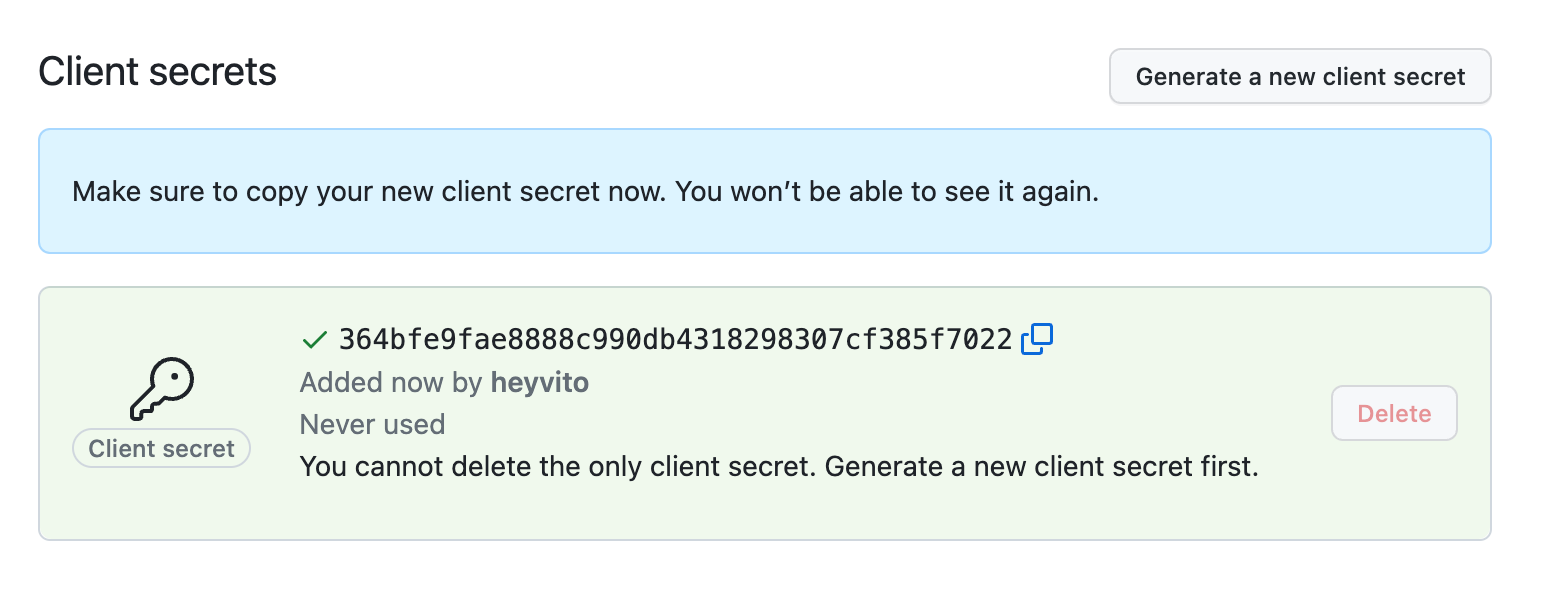
Now that your App was created, it must be further configured so the platform can use it. In the page GitHub displays right after creating it, look for the Generate a new client secret button, and click it:
It will generate a your secret key. As the name may suggests, it is secret! Do not share it with anyone. (Yes, even if the person in question offers you biscuits.)
Take note of the secret key, as you will need to provide it to the API.
Then, under Display information you will have the option to upload a logo. If you wish to use Cocov’s logo, you can use the following image (right-click, Save As…):
![]()
Finally, under Private keys, create a private key and store it somewhere safe. Like many of the information on this page, it will be required to configure the API. Click the Generate a private key button, and GitHub will generate and download the generated private key file.
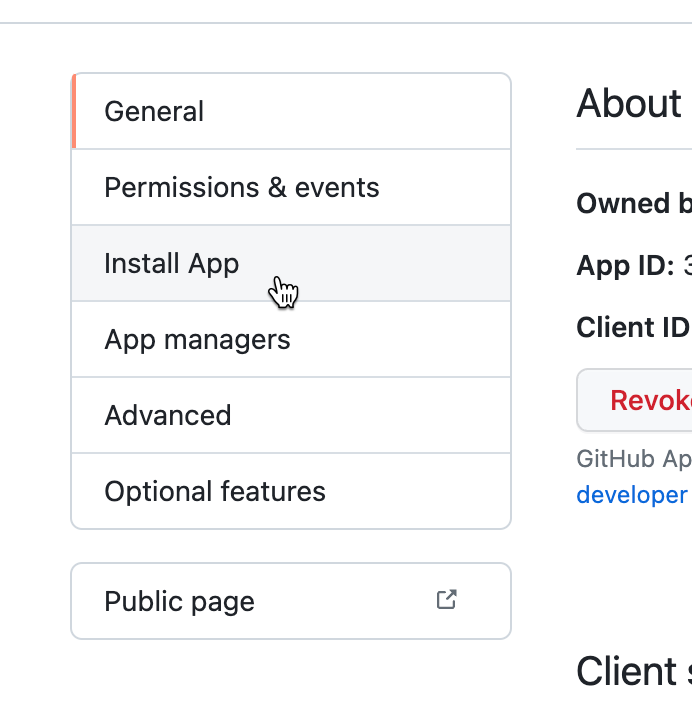
Installing the App #
Now, we install the created app into the organization. This will effectively enable the app on the organization, which will begin pushing events, and allowing the app to access it.
In order to do that, scroll to the top of the page, and on the menu on the left, click “Install App”:
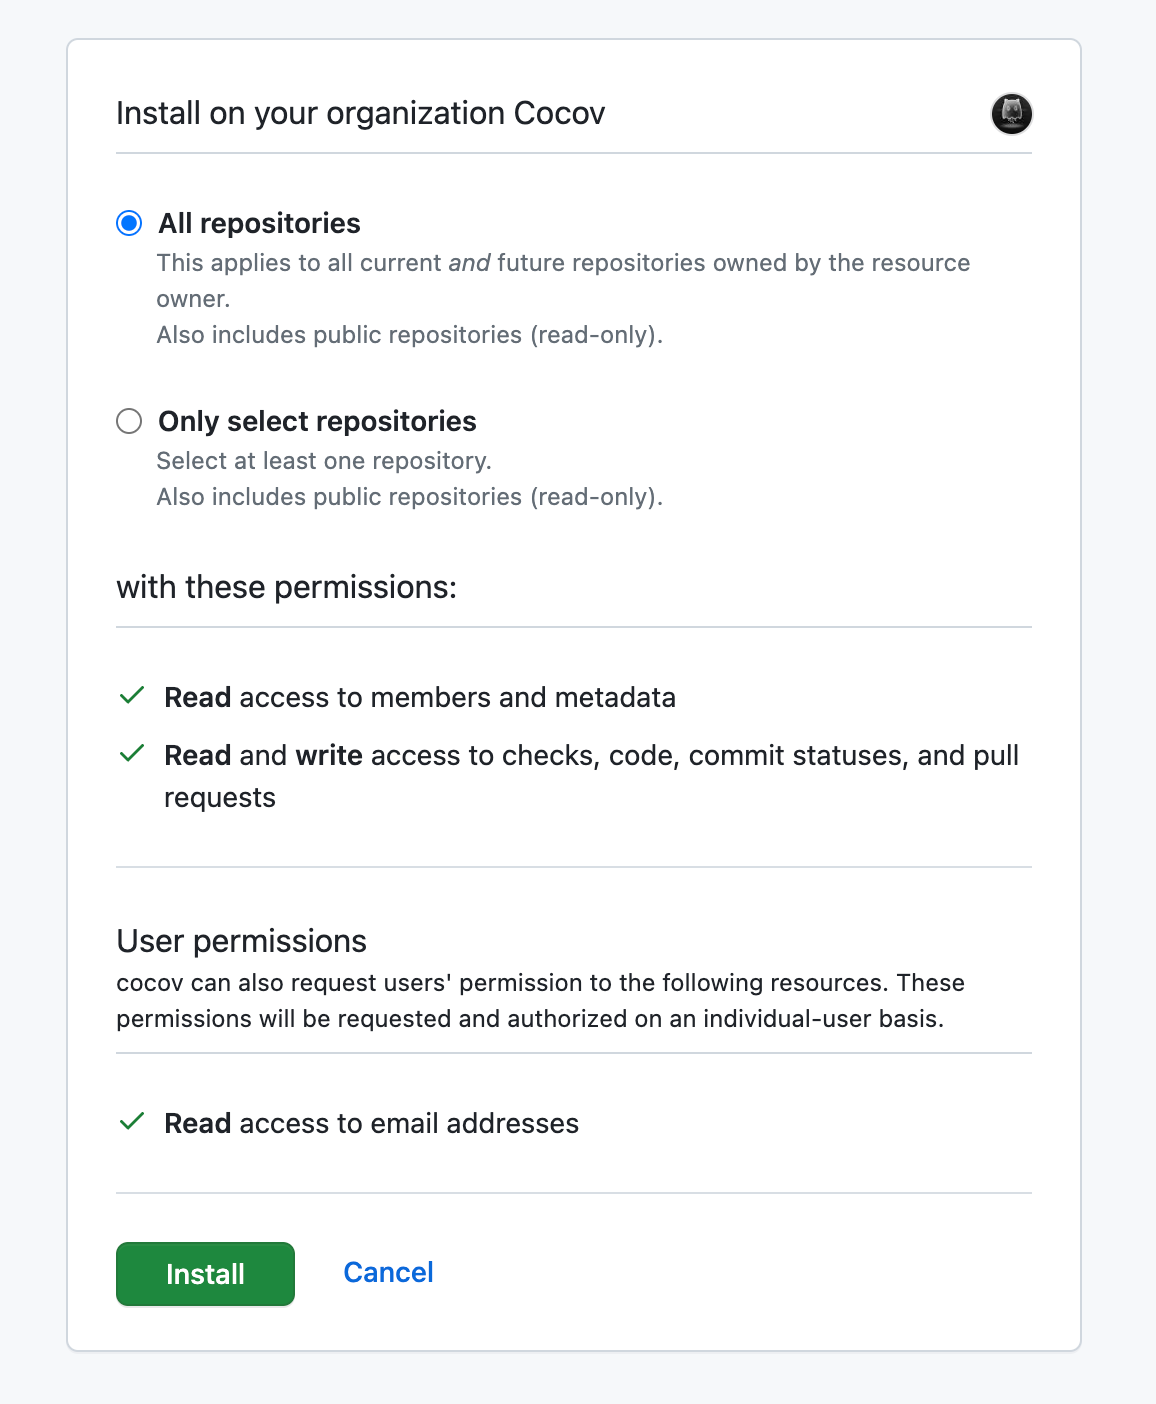
Then, click the green button to finish the installation process. In the next screen, it is recommended to select All repositories, but in case you really need to only allow specific repositories, select the other option, but be aware that Cocov will be limited access to your organization.